Wednesday, November 21, 2012

Thanksgiving Dinner

I made Thanksgiving for myself this year.   Not the first time.  Probably won't be the last.  I don't mind at all. I love cooking.  It's a relaxing day for me.  No pressure.  No worries.

So even though I'm alone, I still put on the full Thanksgiving spread.  Just a little pared down.  Here's my recipes for dinner.

Cranberry sauce

12 oz. fresh cranberries
1 cup orange juice
1/2-3/4 cup white sugar

Put all in a pan and heat to a rolling boil.  Reduce heat to a simmer and simmer until sauce thickens a bit.  Take off the heat, allow to cool and put in a serving dish.  Can be made ahead and chilled.

Sweet Potato Casserole

My favorite part of the meal.

3 whole sweet potatoes, peeled and boiled until soft
1/2 stick butter
1/2 cup orange juice
2 eggs, beaten
1/2 teaspoon vanilla extract
1/2 cup white or brown sugar (optional)
1/4 teaspoon ground cinnamon
1/4 teaspoon ground ginger
1/8 teaspoon nutmeg

Whip all with a beater.  Put in a casserole pan.  Cover with topping.  Bake at 350 degrees F for approximately 30 minutes or until thoroughly heated.

Pecan topping
3 tablespoons butter, melted in microwave
1/2 cup brown sugar
1 cup pecans
2 tablespoons all purpose flour

Mix sugar, flour and nuts with butter in a bowl and sprinkle over sweet potatoes.

Stuffing
I do not stuff my bird with stuffing while it roasts.  I make it separately and have never bothered to stuff the bird with it.  I serve it on the side.  I always use Pepperidge Farm sage stuffing and follow the directions on the package except that I also add one can of diced water chestnuts.  Mmmm.  That's good eating right there.

Turkey
I brine the turkey for approximately 24 hours.
Brine solution:
14-16 lb. turkey
1-2 gallons of water (whatever it takes to cover the bird)
1 cup salt
2 oranges, quartered
2 lemons, quartered
3 sprigs rosemary
1/2 teaspoon dried thyme
handful of black pepper corns

To roast the turkey, I've been using Bobby Flay's Roasted Turkey Rubbed with Roasted Jalapeno-Sage-Orange Butter

2 cups orange juice
Zest of one orange, grated
2 sticks unsalted butter, room temp
3 jalapenos, roasted, peeled, seeded
1/4 cup fresh sage (or 1/2 teaspoon dried)
Salt and pepper
and, of course, the turkey

Put the orange juice in a nonreactive pan and bring to a boil over high heat.   Reduce to about 1/2 cup.  Let cool to room temp.  Put the butter, cooled orange syrup, orange zest, japaleno and sage in a food processor and whip until smooth.  Scrape into a bowl.  Make this a day in advance and store it in the fridge.  Bring to room temp before using.

Preheat oven to 450 degrees F.  Remove the innards from the turkey and set aside.  Rinse the bird with cold water and pat dry. Rub the surface of the turkey with 1/2 of the butter.  Season the skin and the cavity liberally with salt and pepper.  Truss the turkey, put in a roasting bag, and place on a rack in a large roasting pan.

Roast the turkey for 30 minutes, then turn the temperature down to 375 degrees and continue to roast for 1.5 hours or until the internal temperature reaches 165 degrees F.  I usually buy a bird with a pop-up thermometer, so I use that as my signal that it's done.  Brush the remaining butter on the bird every 15 minutes.  Remove the turkey from the oven and let rest for 20 minutes before carving.  I generally watch the bird pretty closely and loosely cover the top of the bird if it is getting over browned.

I usually carve in an unceremonious manner.  First I remove the legs and thighs, then I remove both the breasts and pull off the wings.  I slice one of the breasts in thick slices and leave the remaining pieces whole.  I usually go for a thigh.  I like the dark meat.  No pun intended.

After dinner, I go back and start picking the carcass clean and put on a stock pot, dump in the carcass, some celery and carrots and usually a yellow onion, quartered, cover with water, and make some stock.  The stock comes in handy for the leftovers.

Broccoli Casserole

1 large head of broccoli (approximately 5 stems)
1 cup mayo
1 can cream of mushroom soup
1/4 small onion, grated
2 eggs, beaten
Durkee French Fried Onions
1 cup grated cheddar cheese (optional)

Prepare the broccoli. Place broccoli in an oven- and microwave-safe bowl with approx. 2 tablespoons of water and microwave on high for 7-10 minutes.  Remove from microwave.  In a bowl, beat 2 whole eggs.  Add mayo, mushroom soup, cheese and onion to the eggs.  Spoon liquid mixture over broccoli and cover with dried onions.  I skip the cheese because I'm lactose intolerant, but it is very good in the dish.  Bake at 350 degrees F for approximately 50 minutes.

And there you have it.  My Thanksgiving dinner in a single post.   I wish you all the best Thanksgiving you can possible have.   Maybe one day, we'll enjoy Thanksgiving dinner together.

Follow Me on Pinterest

Wednesday, November 14, 2012

Apple Pie Liqueur

This is delicious.  It's liquid candy with a punch.  I highly recommend it.  Goes well with campfires, holiday parties, and great friends.

Apple Pie Liqueur

1 gallon apple juice (I used 3 cans frozen with 15 cans of water)
1 gallon apple cider
4 cups brown sugar
4 cinnamon sticks
2 tablespoons of allspice berries
4/5 whole cloves
1 teaspoon fresh grated nutmeg
juice of one fresh orange
A fifth (750 ml) Everclear
1/2 fifth (350 ml) Spiced Rum

Place all ingredients except the everclear into a pot and bring to a boil.  Stir well until the sugar melts.  Remove from heat and allow to cool to room temperature, at least 1 hour.

Add the entire bottle of everclear.

Warning:  Everclear is flammable. As in REALLY FLAMMABLE. Do not put this into the pot when it is warm.  Do not use it near an open flame.

FOLKS.  Keep Everclear away from the heat!

Strain the allspice and cinnamon sticks from the liquid and bottle. Place one piece of the stick cinnamon in each bottle. This makes a very, very large batch.  Great for Christmas presents.  Not overly alcoholic.  I would guess it's about 40 proof but I haven't really done the math.

You won't be sorry.

Follow Me on Pinterest

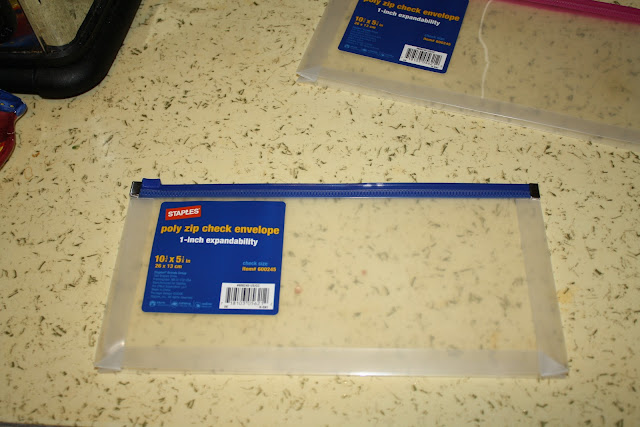
Great Kitchen Idea: Recipe/Take-out menu holder

If you are like me, when you cook, hanging on to the recipe gets to be a problem.  You lay it down, walk away, clutter the counter tops, and just when you are at that emergency point, you can't lay your hands on the recipe.

Problem solved.

Cost:  About $4.00.


Put it on the back of the cabinet door where I do most of my food prep.  


Then I thought, why not find a good place for those take-out menus while I'm at it!


Problem solved.  Recipe is always where I need it at eye level, never misplaced and in case of spills on the counters, it doesn't get soiled!  Take out menus are always handy!

Follow Me on Pinterest

Friday, November 9, 2012

Homemade laundry soap - Not a Fan!

** Read to the bottom for my 6 month update**

I've been beyond derelict in getting around to fulfilling those New Year's resolutions, one of which was to explore means of "greening" my life.  So today I decided to try my hand at making my own laundry soap.  I found a recipe online and headed off to the local Rural King in search of various detergents.


It's really very simple to make. One large box of baking soda, another of borax, Arm and Hammer Super Washing Soda, one tub of Oxi Clean, and 3 bars of Fels Naptha soap.

Unwrap and stick the soap in the microwave for 2.5 minutes at half power (it puffs up like a marshmallow).  Then spin the bar soap in a food processor to create soap powder.

Put everything in a 3.5 gallon bucket, mix well and voila.

You use much less of this since there are no fillers.  Each load gets 1-2 tablespoons of soap, depending on its size.  It took minutes to put together, and the cost is about half that of the cheapest liquid laundry detergent on the market.  Here are the figures.


Homemade
All  Free & Clear Laundry Soap, 150 oz.
Tide 2X Ultra, 150 oz.
Product Cost

 $               11.97
 $            17.97
Borax
 $            2.99


Baking soda
 $            3.99


Oxy Clean, 96 oz.
 $            4.00


Arm and Hammer Super Washing Soda
 $            3.24


Fels Naptha Soap (X3)
 $            4.47


Tax
 $            1.40
 $                 0.90
 $              1.35
Total
 $         20.09
 $               12.87
 $            19.32
# of Loads
250
97
90
Cost per load
 $            0.08
 $                 0.13
 $              0.21

After using this for a week or so, I've decided that there is too much filler and not enough soap in this.  So I'm going to add two more bars of the Fels Naptha and see if that doesn't improve its performance some.  Check back for more updates!

OK, after using this for a while I have some feedback.  First, unless you wash in hot, hot water, anything but the completely powdered fels naptha soap fails to melt.  Unmelted soap can't do it's job. In fact, even in hot water, I sometimes find little balls of fels naptha soap in the dryer vent screen.  So, I have to say, in many instances, I'm washing my clothes in softened water without soap!  So no, I can't say that I'm a fan of this for everyday use.  I now use it as an additive to my laundry soap.   Softened water does allow the soap to do a better job, but I've returned to using store-bought liquid laundry soap as the main cleaning agent.

And no, I won't be making this again.  I can always add a little washing soda toand borax for much less $$.

Follow Me on Pinterest

Tuesday, October 30, 2012

Downeast Maine Pumpkin Bread

When late summer casts an amber glow on the blazing leaves and the air becomes crisp and chill, you can bet its time to break out the soup recipes and fish that jar of sage out of the forgotten corner of the spice cabinet.  Fall is finally here and with it the official opening of comfort food season.  And Boy Howdy is Daktari ready.

I was shopping in town one day and saw a bin of sugar pie pumpkins with the low, low sale price of $0.28/lb.  There is nothing like a seasonal favorite to make me believe I have tons of time to cook and do all sorts of things that normal people who aren't writing their dissertations do.  That happy orange gourd caused my mind to wander.  Fresh pumpkin in my oatmeal.  Pumpkin-whipped cream desserts.  Savory pumpkin soup. so four of them came home with me.  Total cost: a little over $2.50.

In them meantime, a friend was anticipating surgery and I volunteered to bake some treats for him and his caretakers.  So I sacrificed the pumpkins to a greater cause.  Halved and deseeded, I popped two of them in the oven (cut side down at 350F) and an hour later was rewarded with a bowl of steaming orange deliciousness.

 I took a chance on this recipe I found over on Allrecipes, and am I ever glad I did.  This is, hands down, the best quick bread recipe I've ever made.  Better than Goldie Hutchinson's zucchini bread recipe.  Better than any banana bread I've ever tried.  Better even than the chocolate zucchini bread winner of a few years ago.  I can only say one thing about this recipe.  You must try it.

It is deliciously moist.  It is almost cake like in it's airiness.  It isn't heavy.  It's perfect.  It's heavenly with apple butter.  Probably even better straight out of the oven with melted butter.  You get the picture.

Try it.  I promise you won't regret it.

Downeast Maine Pumpkin Bread

15 oz. pureed pumpkin
4 eggs
0.5 cup vegetable oil
0.5 cup apple sauce (no sugar added, plain)
3 cups white sugar (can reduce to 2 without losing anything)
3.5 cups all purpose flour
2 teaspoons baking soda
1.5 teaspoons salt
1 teaspoon ground cinnamon
1 teaspoon ground nutmeg
0.5 teaspoon ground cloves
0.25 teaspoon ground ginger
1 cup chopped walnuts, optional
1 cup baking raisins, optional

Preheat oven to 350F.  Oil and flour two loaf pans.  I use "baking" Pam spray--the kind with flour already in there--and add a little extra flour to coat.  Be certain to really beat the sides of the loaf pan after dusting to remove most of the excess flour.

Mix the pumpkin, eggs, oil, apple sauce and sugar until well blended.  In a separate bowl, combine flour, soda, and spices.  Wisk to mix.  Add dry ingredients to the mixing bowl and mix until well combined.  If you want to add the nuts and raisins, do so now.  Pour batter into the two pans.

Bake at 350F for an hour or until a toothpick inserted in the middle comes out clean.  Mine cooked for a little over an hour.  More like 65-70 minutes, but keep an eye on yours the first time you make this.

When finished, remove from oven and let cool on the counter at least 10 minutes.  Turn out loaves onto a cooling rack and allow to cool to room temperature.  If you can't wait that long, wait until the bread is still slightly warm and slice it for immediate eating.  Do not cut the loaves while they are still hot.  They will lose that internal heat that continues to bake the bread as it cools.

I really hope you enjoy this recipe.  It earned the Eagan seal of approval.  And that's all that matters.

Follow Me on Pinterest

Sunday, September 30, 2012

Best Buttermilk Waffles (Cook's Illustrated)

This morning, I thought about going to Denny's for breakfast.  Seems that always happens on Sunday mornings.  I get up, want coffee, and then start dreaming about breakfast food.

Then I thought about my pocketbook.  Would cost me $5 in gas to get there and back.  I don't have any other pressing business in Carbondale, so I couldn't justify it as a side trip.  Then I thought, why not make breakfast myself?  It's cheaper, I don't have to leave the house, and I if I have leftovers, I'll freeze them.

I have a ton of sausage (thanks Beckie!) since brother Don, who visited two weeks ago, didn't think he could get the sausage back before it thawed and spoiled.  Silly man. Since I'm not going to Chicago before next Christmas, I figured I'd eat this batch and give him a fresh roll to be made in November.

I settled on a menu of waffles and sausage. I pulled out my 1960s era waffle iron (you know, the one with the fabric cord that heats up on the outside like a pot of boiling oil), and plugged her in.  I put the coffee on, and got started.

Backstory on the recipe...I signed up for a free two-week trial subscription to Cook's Illustrated recipe service (again) and I thought I might as well give it a whirl.  I'm embarrassed to say that I actually paid for a one-year subscription to this service and forgot I had done so and so the whole year was wasted.  But, I have also signed up for their magazine for three years and I really look forward to the new issues arriving.  Those magazines make the circuit through my family and then back to me.  They have yet to steer me wrong.  One of my absolute favorite CI recipes is for cole slaw.  I'm going to have to find that issue and put the recipe on a recipe card.  That's one I never want to lose.

I digress.  This morning I tried their "Best Buttermilk Waffles".  I have to agree.  They are the best I've ever made.  And I actually have tried quite a few waffle recipes.  The worst was the one made with oat flour.  But try these and you won't be disappointed.

My waffle maker cooks four 4" square waffles at a time.  This recipe made two full "trays" of four for a total of 8 servings.  I nearly panicked when I realized I forgot to spray the waffle iron with cooking spray.  It didn't matter.  As long as you wait for the waffles to crisp, they don't stick to the waffle iron.  They key is to know how long it takes for a waffle to cook in your iron and then to not peek.   If you peek, you'll split your waffle along a transverse plane and it will never be right again.

Cook's Illustrated claims that a thick batter makes great waffles.  Take their word for it. Their explanation for the recipe includes the following caveats.  1) Cornmeal in the rate of 1 tablespoon per cup flour helps the waffles crisp.  2) Whipping the egg whites makes the interior of the waffle light and airy.

Trust me, you don't need to melt butter on the top of these waffles.  It would be overkill.

Ingredients:

2 cup unbleached all-purpose flour
2 T cornmeal (optional, but I used it)
1 t table salt
2 eggs, separated
14 oz. buttermilk
4 T unsalted butter, melted (1/2 stick)

Directions:

1.  Get the coffee pot going.  Put the bacon or sausage on if you are so inclined.
2.  Turn on the waffle iron.
3.  Mix together the dry ingredients in a large mixing bowl.
4.  Whisk together the buttermilk, egg yolks, and melted butter.
5.  Pour yourself a cup of coffee.
5.   Pull out your hand-held mixer and whip the egg whites stiff until they hold 2" peaks.
6.  Add the buttermilk mixture to the dry ingredients in a steady stream.
7.  Gently fold in the egg whites.
8.  Check on the sausage or bacon.  Refill your coffee.  I highly recommend adding a little Kahlua.  Just sayin'.
9.  I put about a 1/2-3/4 cup of batter in the center of each of the four sections of the waffle iron or, more technically, four big plops from my rubber spoon.  I add a half "plop" dead center of the iron.  No need to spread it out.  The top of the waffle iron will do that for you.  Put the top down on the iron and walk away for five minutes.  Don't peek.
10.  Remove the waffle from the iron.  It should be golden brown and crispy.  You can hold it in a 200 degree oven if you can help yourself.  I couldn't.
11.  Serve with maple syrup, fruit and confectioner's sugar, or a generous schmear of apple butter. Little tip from your friend D:  Start with one.  You can always get another if you are still hungry.

The key to keeping your waffles from getting all limp and losing their crispness is to NOT STACK THEM.  I hold them directly on a rack in the oven until they cool completely.  Then they can be stacked and frozen.

When it was all over, I had two large waffles with two pieces of sausage, orange juice and coffee.  I will tell you straight up that two waffles was more than my belly could handle.  One is plenty for any adult.  Right now, I'm so full I could pop.  But I do believe that I did this breakfast better than Denny's ever could and it was everything I expected and then some.  Bonus: I have plenty to freeze.

Follow Me on Pinterest

Monday, September 24, 2012

Cook's Illustrated Swedish Meatballs - Great meatball flavor

Note:  I had to revise this post because, well, I was wrong.  The sauce is the most magnificent thing I have tasted in a while.  Maybe it needed to sit.  Maybe it was the sitting overnight that turned it from meh to magnificent.  I was wrong, wrong, wrong.  This dish is perfect as is.  The meatballs are superb and the sauce is...well, you'll see.  Just try it.

I was a little overambitious this weekend and thawed a lot of meat thinking I'd get to all of it before the weekend ended.  That didn't happen.  Every dish took twice as long and Anthony's Pasta Sauce took much longer than that.  In any event, tonight I got around to the Swedish meatballs. I found a recipe on Cook's Illustrated website and tried it out.  The meatballs were delicious.  I prefer them to the meatballs I made yesterday, also from Cook's Illustrated, which were meant for classic spaghetti and meatballs.  Those meatballs were a bit too soft. These are slightly more dense.  Not like a hamburger, but that just right place where meatballs belong.  They were perfect in every bite.  Actually, there is no comparison.  Maybe it's because these meatballs are fried.  I don't think that's it.  Maybe it's the spices.   But these were so much better than the others, that I'm not even going to publish the recipe for the spaghetti meatballs.

However, I'm not sure sure I like this sauce.  Maybe it was because I was already full when I cooked the dish.  Maybe it didn't agree with what I just ate.  I followed the directions exactly and the gravy turned out beautifully (quite possibly the best looking gravy I've ever made), but I thought it tasted 100% better before I added the cream.  Weird, huh?  Who doesn't think heavy cream improves everything?  Anyway, I'll have some tomorrow and let you know if a day for those flavors to marry improve it much.

But don't let that put you off these meatballs.  They are keepers.

 Swedish Meatballs

Published January 1, 2009.  From Cook's Illustrated.


Why this recipe works:We wanted our Swedish meatballs recipe to produce substantial yet delicate meatballs with a sausagelike springiness and satisfying snap. To achieve the right texture, we combined beef, pork, bread, cream, and a surprise ingredient, baking powder, which kept the meatballs delicate and juicy.  For the meatball gravy recipe, we wanted a light cream sauce instead of heavy brown gravy.  To get this, we added a bit of cream to our stock to lighten it up and and a splash of lemon juice for some bright flavor.

Serves 4 to 6
The traditional accompaniments for Swedish meatballs are lingonberry preserves and Swedish Pickled Cucumbers (see related recipe). If you can’t find lingonberry preserves, cranberry preserves may be used. For a slightly less sweet dish, omit the brown sugar in the meatballs and reduce the brown sugar in the sauce to 2 teaspoons. A 12-inch slope-sided skillet can be used in place of the sauté pan—use 1 1/2 cups of oil to fry instead of 1 1/4 cups. The meatballs can be fried and then frozen for up to 2 weeks. To continue with the recipe, thaw the meatballs in the refrigerator overnight and proceed from step 3, using a clean pan. Serve the meatballs with mashed potatoes, boiled red potatoes, or egg noodles.

Ingredients:

  • Meatballs  
  • 1 large egg
  • 1/4 cup heavy cream
  • 1 large slice sandwich bread, crusts removed and bread torn into 1-inch pieces
  • 8 ounces ground pork
  • 1 small onion, grated on large holes of box grater (about 1/4 cup)
  • 1/8 teaspoon freshly grated nutmeg
  • 1/8 teaspoon ground allspice
  • 1/8 teaspoon ground black pepper
  • 1 teaspoon packed brown sugar (see note)
  • 1 1/2 teaspoons table salt
  • 1 teaspoon baking powder
  • 8 ounces 85 percent lean ground beef
  • 1 1/4 cups vegetable oil
  • Sauce  
  • 1 tablespoon unsalted butter
  • 1 tablespoon unbleached all-purpose flour
  • 1 1/2 cups low-sodium chicken broth
  • 1 tablespoon packed brown sugar (see note)
  • 1/2 cup heavy cream
  • 2 teaspoons juice from 1 lemon
  • Salt and ground black pepper

Directions:

  1. 1. For the Meatballs: Whisk egg and cream together in medium bowl. Stir in bread and set aside. Meanwhile, in stand mixer fitted with paddle attachment, beat pork, onion, nutmeg, allspice, pepper, brown sugar, salt, and baking powder on high speed until smooth and pale, about 2 minutes, scraping bowl as necessary. Using fork, mash bread mixture until no large dry bread chunks remain; add mixture to mixer bowl and beat on high speed until smooth and homogeneous, about 1 minute, scraping bowl as necessary. Add beef and mix on medium-low speed until just incorporated, about 30 seconds, scraping bowl as necessary. Using moistened hands, form generous tablespoon of meat mixture into 1-inch round meatball; repeat with remaining mixture to form 25 to 30 meatballs.
  2. 2. Heat oil in 10-inch straight-sided sauté pan over medium-high heat until edge of meatball dipped in oil sizzles (oil should register 350 degrees on instant-read thermometer), 3 to 5 minutes. Add meatballs in single layer and fry, flipping once halfway through cooking, until lightly browned all over and cooked through, 7 to 10 minutes. (Adjust heat as needed to keep oil sizzling but not smoking.) Using slotted spoon, transfer browned meatballs to paper towel-lined plate.
  3. 3. For the Sauce: Pour off and discard oil in pan, leaving any fond (browned bits) behind. Return pan to medium-high heat and add butter. When foaming subsides, add flour and cook, whisking constantly, until flour is light brown, about 30 seconds. Slowly whisk in broth, scraping pan bottom to loosen browned bits. Add brown sugar and bring to simmer. Reduce heat to medium and cook until sauce is reduced to about 1 cup, about 5 minutes. Stir in cream and return to simmer.
  4. 4. Add meatballs to sauce and simmer, turning occasionally, until heated through, about 5 minutes. Stir in lemon juice, season with salt and pepper, and serve. 
Follow Me on Pinterest

Sunday, September 23, 2012

Red Sauce like your Italian Grandma Made

I used to have time to monkey around on the internet.  And on one of those forays into the Interwebs, I found one of the best recipes of all time.  Anthony's Pasta Sauce, Meatball & Braciole.  This recipe is great for a number of reasons, not the least of which is taste.  But if you want to understand why I love this recipe, you really have to go take a look at Anthony's recipe.  It is, perhaps, the longest recipe you've ever read.  But you don't get bored.  He's entertaining.  And honestly, this is the real deal.

Just like your Italian grandma would have made if you had an Italian grandma.  

Follow Me on Pinterest

Saturday, September 22, 2012

Israeli Couscous Salad: The Only Picnic Salad I Ever Liked


When I go to potlucks, I normally pass on every sort of salad.  Potato salad?  No.  Macaroni salad?  No.  Three bean salad?  Oh hell no.  If it didn't have lettuce in it, I wasn't biting.  Literally.

So imagine my surprise at finding a salad I not only liked, but was wild over.  I was introduced to this sweet little dish by Julie Schmale during the Sixth Annual Camping Event Not To Be Named.  Since this weekend was the Eighth Annual Camping Event Not To Be Named, and since Julie just sent me this link, I thought I'd share this delicious dish with you.  I love this dish.  Love it.

From Cooking with Trader Joes.

Beckie's Israeli Couscous Salad

The Dressing:
1/4 cup extra virgin olive oil
2 Tbsp fresh lemon juice
1 1/2 tsp chopped garlic (or use 1 cube frozen Crushed Garlic )
1/2 tsp dried oregano
1/2 tsp kosher salt or to taste
black pepper to taste
1/4 cup sugar

1 box Trader Joe's Israeli Couscous (found in the pasta/rice aisle)
1/3 cup unsalted dry toasted sliced almonds
1/3 cup dried cranberries
1/4 cup  thinly sliced fresh basil
2 oz Lite Feta cheese, crumbled or 2 oz Crumbled Feta (regular or fat free)

1.) Whisk together the olive oil, lemon juice, garlic, oregano, salt, pepper, and sugar in a medium bowl. Set aside.
2.) Follow cooking instructions on the Israeli Couscous box.  Add cooked couscous to the bowl containing the dressing. Toss with the dressing and let it cool (about 20-30 minutes), stirring occasionally.  The couscous will absorb the dressing as it cools.
3.) Add the almonds, cranberries, and basil. Toss the feta cheese in lightly. Add more salt and pepper if needed.

Serves 4

Variations:
If you don't have Israeli couscous, substitute 1 1/2 cups of dried orzo or TJ's Harvest Grains. Cook until al dente, drain and then add to the dressing.
If you don't have fresh basil, substitute fresh parsley (or a combination of both) . If you don't like almonds, substitute toasted pignoli nuts.

Follow Me on Pinterest

********

And because the Camping Event was this weekend, here's some pics from my short visit with the friends.  Make sure you get out this year!


Saturday, September 15, 2012

Pico de gallo

Pico is quick and easy and tasty as hell.

Ingredients:

6 roma tomatoes, cored and diced
1/2 yellow onion, diced
1/4 cup cilantro leaves, chopped
juice of one lime
salt to taste

Mix all ingredients and allow to chill for about an hour.

Serve with your favorite corn chips.

Yum.

Follow Me on Pinterest

Friday, September 14, 2012

Chocolate Espresso Pot de Creme

Pot de creme.  It is just fun to say.  For those non-francophones, you pronounce it po-duh-krem.  But you have to say that last part like you are making fun of the French.  Which you are.  Don't worry.  Every one does.  Say it out loud a few times.  Pot de creme.  Pot de creme.  Pot de creme.  Sounds all wordly and stuff.  This dessert is amazingly simple and you are apt to impress the in-laws with this one.

It contains precious few ingredients and is ready for the fridge in a flash.

Now a few words of advice.  I didn't want an overly sweet dessert so I doubled this recipe and only used 1/3 cup of sugar. This really allowed the bittersweet nature of the chocolate to shine. But I get that a lot of people don't enjoy bitter desserts as much as I do, so feel free to add a little more sugar to taste.


What you'll need:

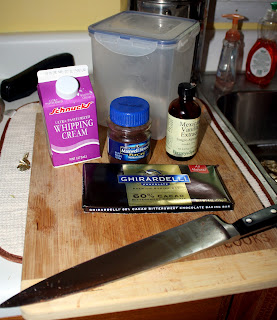
4 oz. dark chocolate (bittersweet)
1/3  to 1/2 cup sugar
1 cup heavy whipping cream
espresso powder or instant coffee crystals
1/2 teaspoon vanilla extract


Use good chocolate.  I used Giardelli's 70% cacao.  Whoops, make that 60%.


Directions:


Use your kitchen knife to shave the chocolate thin.  Put heavy cream, sugar, and vanilla extract in a small saucepan and heat over low to medium heat until just below the boiling point.  I actually used a double-boiler system.  Do not walk away from this pan.  If you don't stir the cream constantly, it will begin to form curds in the bottom and that is definitely what you don't want in this smooth, rich dessert.  Once you get it to temperature, remove from heat and pour over the shaved chocolate.  Wait one minute.  Sing Yankee Doodle.  Practice your yodeling.  Lick the chocolate shavings off the cutting board like I did.  After one minute, whisk the chocolate and cream until you get the smoothest, richest liquid imaginable.  Pour into small cups or mugs.  I used cordial glasses, but you could also use espresso cups.  If you get air bubbles in your dessert cups, raise the cup up a few centimeters and drop it back gently to the counter.  The air bubbles will be forced to the top and pop leaving you with a perfectly smooth, dessert that looks (and tastes!) spectacular.

Makes four 2-3 ounce servings.  Refrigerate 3-5 hours.  (Mine took about 2 hours to chill.)

The consistency when finished is like a soft fudge.  If you only have a slightly thickened pudding texture, put it back in the fridge for another few hours.  You can top this with whipped cream, but it is excellent as is.  I warn you.  This is 90 kinds of delicious.  It is pure chocolate decadence.


Follow Me on Pinterest

Sunday, September 9, 2012

Chance's Oatmeal Peanut Butter Dog Biscuits

Chance the Magnificent!
Post script:  I am sorry to say that Chance passed away on September 29, 2012.  My sister got him when he was about 3 years old at a shelter in Scranton, Pennsylvania.  Chance suffered from Grand Mal seizures.  It was not uncommon for his seizures to last up to 20 minutes.  No doubt, this is the reason he ended up in the shelter.  But my sister rescued Chance and turned him into the most spoiled lap dog you would have ever met.  Despite this failing, he was an awesome dog.  He was loved by all and will be missed.  I'm glad for all the great memories and we will always remember him when making *his* dog biscuits for our pets.   

This is a recipe given to me by my sister.  Her cocker spaniel Chance just loves them, so I've named them after him.  Apparently, he thinks he owns them.  The best thing about this recipe is that it is quick and easy.

Ingredients:

1/4 cup peanut butter (I use creamy, natural peanut butter)
1 tablespoon vegetable oil (invariably I add up to another tablespoon)
1 cup water
2.25 cups whole wheat flour
1 cup old-fashion oatmeal

Directions:

Mix.  Roll to 1/4" and cut into squares or shapes.  Bake at 375F for 35 minutes.

I usually don't measure the peanut butter.  I just use a very large scoop of it.  I sometimes have to add more water to get the dough to tighten up.  I use a bench knife to cut them into bit-sized squares, although my sister uses a dog-bone cookie cutter.  I prefer giving the dog smaller treats.  But whatever you do, keep an eye on these in the oven, because if your dough is thin, they can burn around the edges if you don't watch them.

Dogs love them.  Scout can't wait for them to cool before he's begging for a few.

Follow Me on Pinterest

Tuesday, September 4, 2012

Homemade granola

**A postscript (which is really a pre-script if you are reading this for the first time :p)  This is delicious as a cereal in the morning for breakfast.  It's got legs, so stick with about 1/2 cup or less.  I also added dried cherries as an afterthought.  They are really good in this.
I bought a giant package of oats for the topping on my apple crisp.  The topping reminded me of granola, which got me to poking around the internet to find a granola recipe.  I found this one.  I'd never made granola before and quite honestly, I'm not much of a granola eater.  But I do like granola or grape nuts mixed into my yogurt now and again, and I figured, What the heck?
The ingredients for this recipe are expensive.  I didn't have wheat germ or oat bran on hand, so I had to buy them especially for this.  If I don't like this recipe enough to make again, I'm going to struggle to find something to use those ingredients in.  It contains both nuts and seeds and those aren't cheap. I substituted coconut oil for the vegetable oil.  I used cranberries, not raisins.

I made half a recipe.  It made a full cookie sheet of granola, and not some thin little cookie sheet full.  It was layered at least 1/2" thick on that sheet.  I'd guess it made about 8 cups of granola.  Maybe closer to 10 cups.  It really did need to be stirred in the middle of cooking. In any event, that is way more than enough to keep one or two people happy for a week or two of dedicated granola eating.  The full-recipe would need to be frozen in my household.  I plan on keeping this in the fridge.  I'll let you know how long it lasts in there.

OK, for the important part.  How does it taste?

Awesome.  It is a bit sweet, but the tartness of the cranberries is a nice contrast.  It is nutty.  I used pecans, walnuts, almonds and sunflower seeds.  The only nuts you can taste are the walnuts and pecans.  Next time, I'll leave out the sunflower seeds for sure.  They are just not making their presence known.  But, it is really good.  I don't think I'll have to worry about what to do with the wheat germ and oat bran.  Maybe when I make it again, I'll even throw in some ground flax.  Fiber is good for you, you know.

So if you and yours are granola-eating tree-hugger types, this would make for good camp food.

This recipe halved

Ingredients

  • 8 cups rolled oats
  • 1 1/2 cups wheat germ
  • 1 1/2 cups oat bran
  • 1 cup sunflower seeds
  • 1 cup finely chopped almonds
  • 1 cup finely chopped pecans
  • 1 cup finely chopped walnuts
  • 1 1/2 teaspoons salt
  • 1/2 cup brown sugar
  • 1/4 cup maple syrup
  • 3/4 cup honey
  • 1 cup vegetable oil
  • 1 tablespoon ground cinnamon
  • 1 tablespoon vanilla extract
  • 2 cups raisins or sweetened dried cranberries

Directions

  1. Preheat the oven to 325 degrees F (165 degrees C). Line two large baking sheets with parchment or aluminum foil.
  2. Combine the oats, wheat germ, oat bran, sunflower seeds, almonds, pecans, and walnuts in a large bowl. Stir together the salt, brown sugar, maple syrup, honey, oil, cinnamon, and vanilla in a saucepan. Bring to a boil over medium heat, then pour over the dry ingredients, and stir to coat. Spread the mixture out evenly on the baking sheets.
  3. Bake in the preheated oven until crispy and toasted, about 20 minutes. Stir once halfway through. Cool, then stir in the raisins or cranberries before storing in an airtight container.


Follow Me on Pinterest

Monday, September 3, 2012

Madge Bullington's Famous Apple Cake


YUM!
Can you tell it's apple season?  My tree produced a bumper crop this year, despite our exceptional drought. The late, late, late summer rains were just enough to put the apple crop over the top.  The apple tree was planted the year I moved to this house (8 years ago) and this is my first harvest.  I've enjoyed it so much.  It has been a challenge, however, to find ways to use up all these apples.  Thankfully, I've had enough to share with friends and family AND squirrels AND birds AND rabbits.

In any event, my mother has talked about this apple cake made by a woman who used to go to our church when I was a kid.  Madge Bullington.  I'm sure at one time I knew her by sight, but I'm having a hard time putting a face to that name these days.  In any event, her reputation for apple cake lives on.  And anyone who knows me knows that I never pass up "church food".  Whatever my beliefs or lack thereof, I hold no prejudice against Christian cooks.

Without further ado, here we go.....

Apple Cake

2 cups sugar
2 eggs
1 teaspoon vanilla extract
1.25 cups Crisco oil  (oops, I used Crisco shortening!)

2.5 cups flour
1 teaspoon salt
1 teaspoon baking soda
2 teaspoons baking powder

3 cups apples (use Macintosh or Granny Smith, not Red Delicious or Rome)
add lemon juice if not tart enough
1.5 cups nuts

Cream first four ingredients.  Combine and sift the next four ingredients and add to the creamed mix.  Add the apples, lemon juice, and nuts and fold into the mix.  Bake at 350 for one hour.  The dough will be like cookie dough until you add the apples.

It does not appear that using shortening as the fat instead of oil causes any problems at all.  Come to think of it, how would you "cream" together something that contained oil and not shortening? I think maybe they intended shortening and maybe my mother wrote the recipe down wrong.  I also used five apples and that ended up making a short 4 cups of sliced apples.  I threw them all in anyway.  No harm, no foul.  The cake is moist and delicious.  I cooked it for exactly one hour, which was just how long it took for a toothpick to come out clean.  I have one thing to say:  this is going in the freezer ASAP before I eat it all!